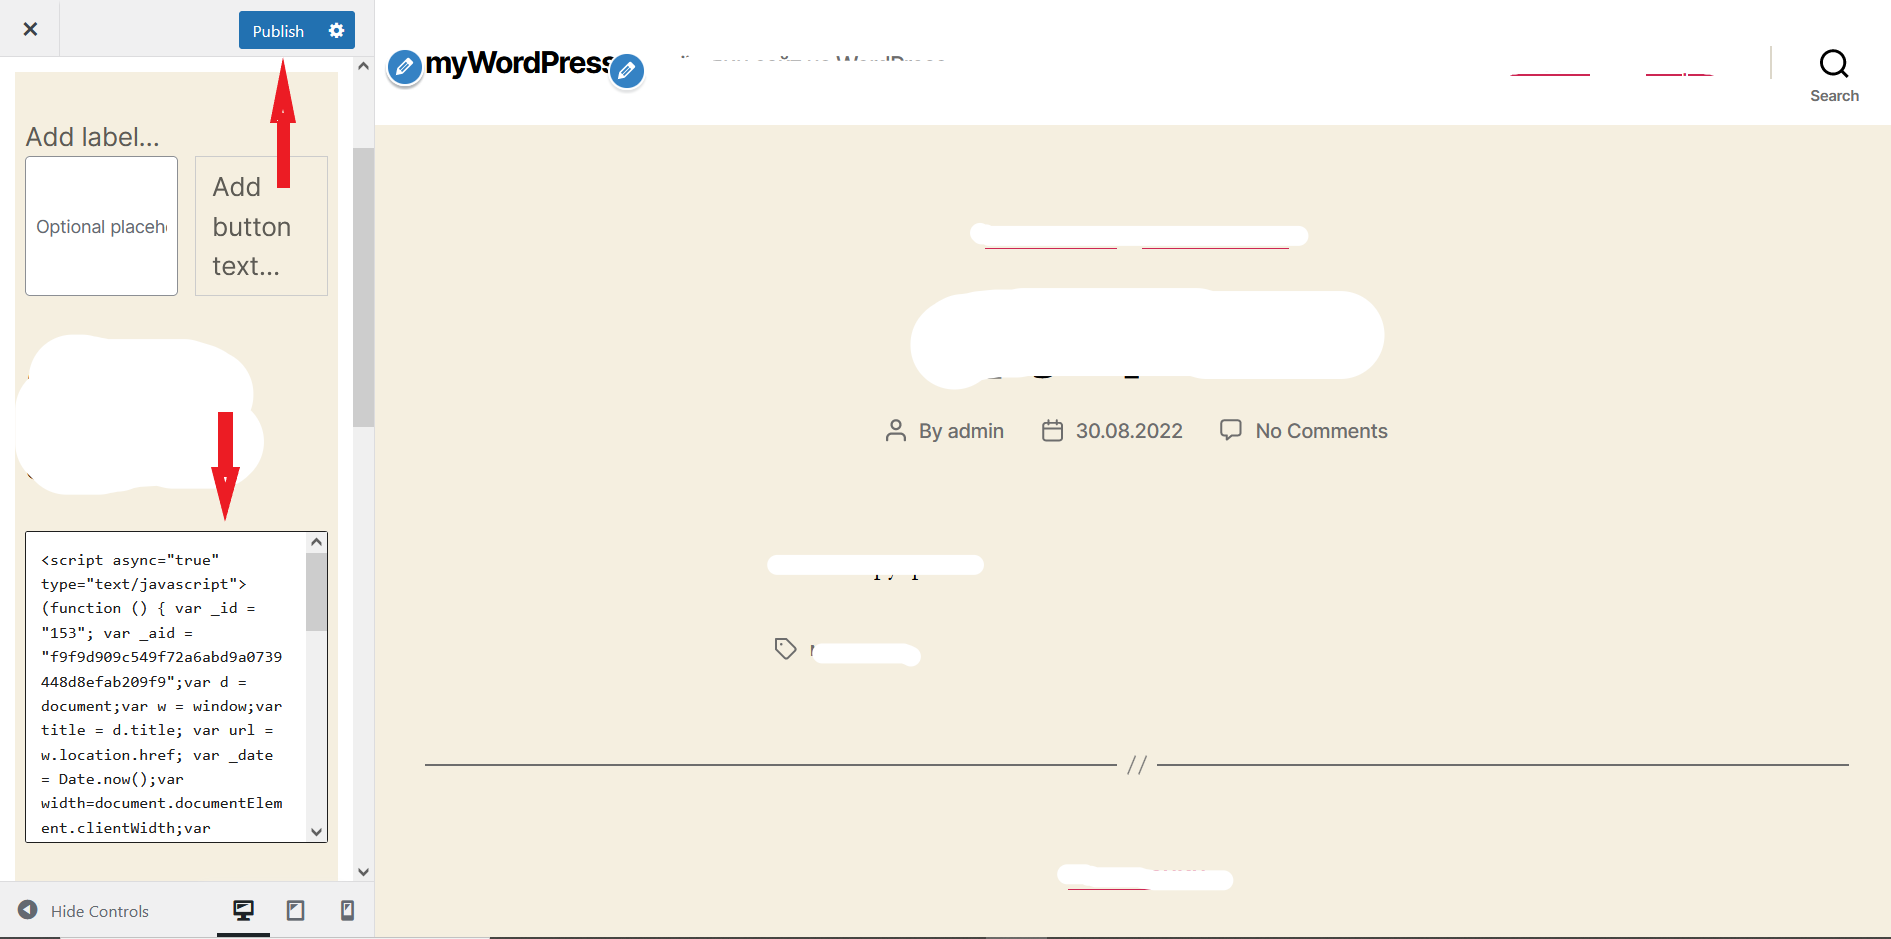
If you created your project on the WordPress platform, then you can add a chat to it by two ways. Using our plugin or using the “Custom HTML” block. To do this, you need to follow a simple sequence of actions. Let's do them using the standard "Twenty Twenty" pattern as an example.
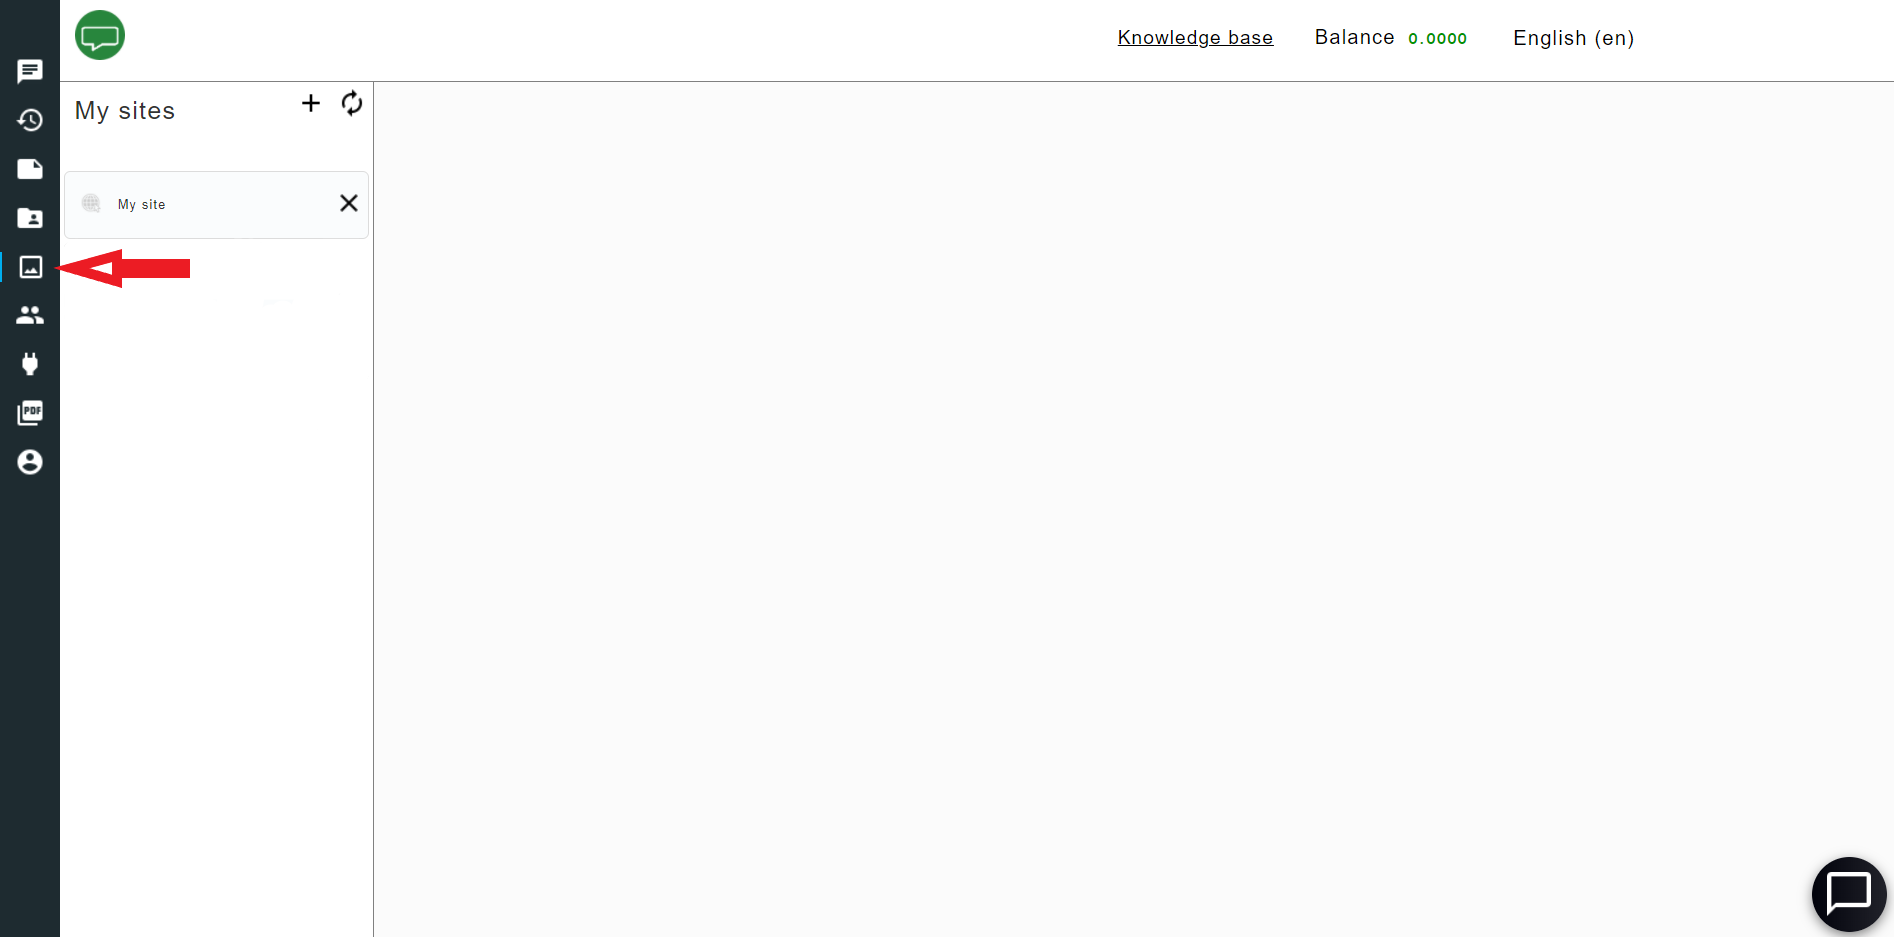
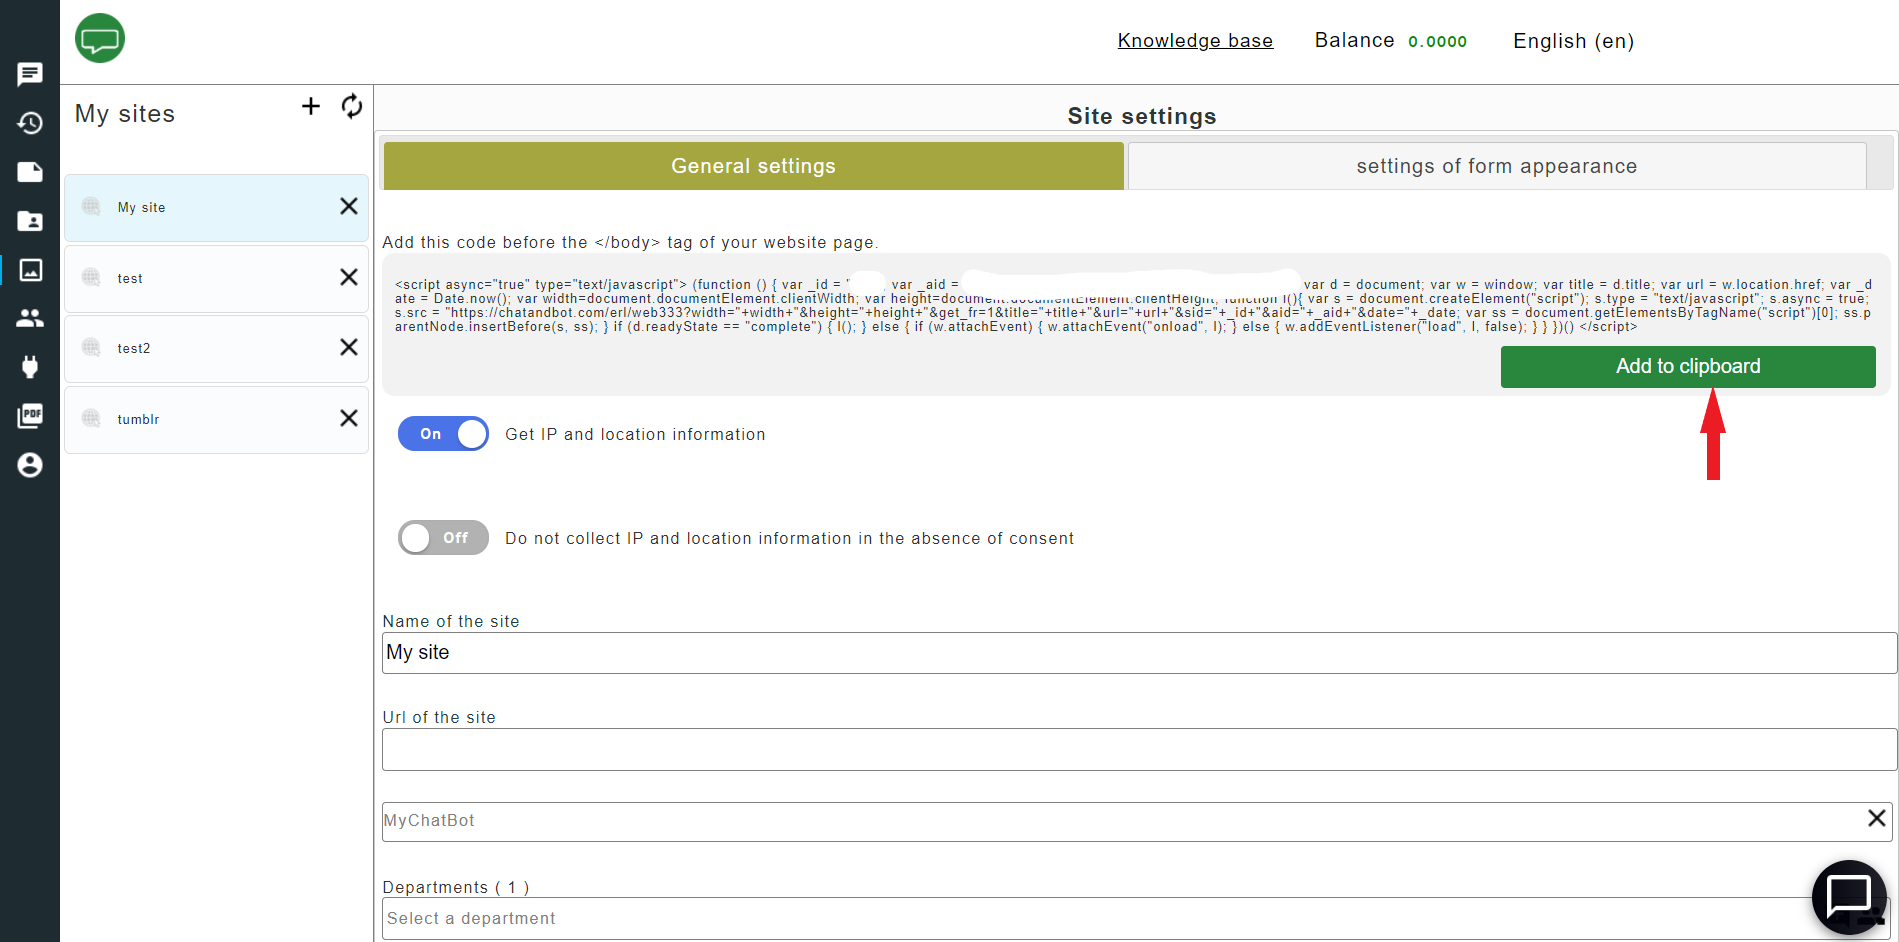
2. Open the Sites tab.
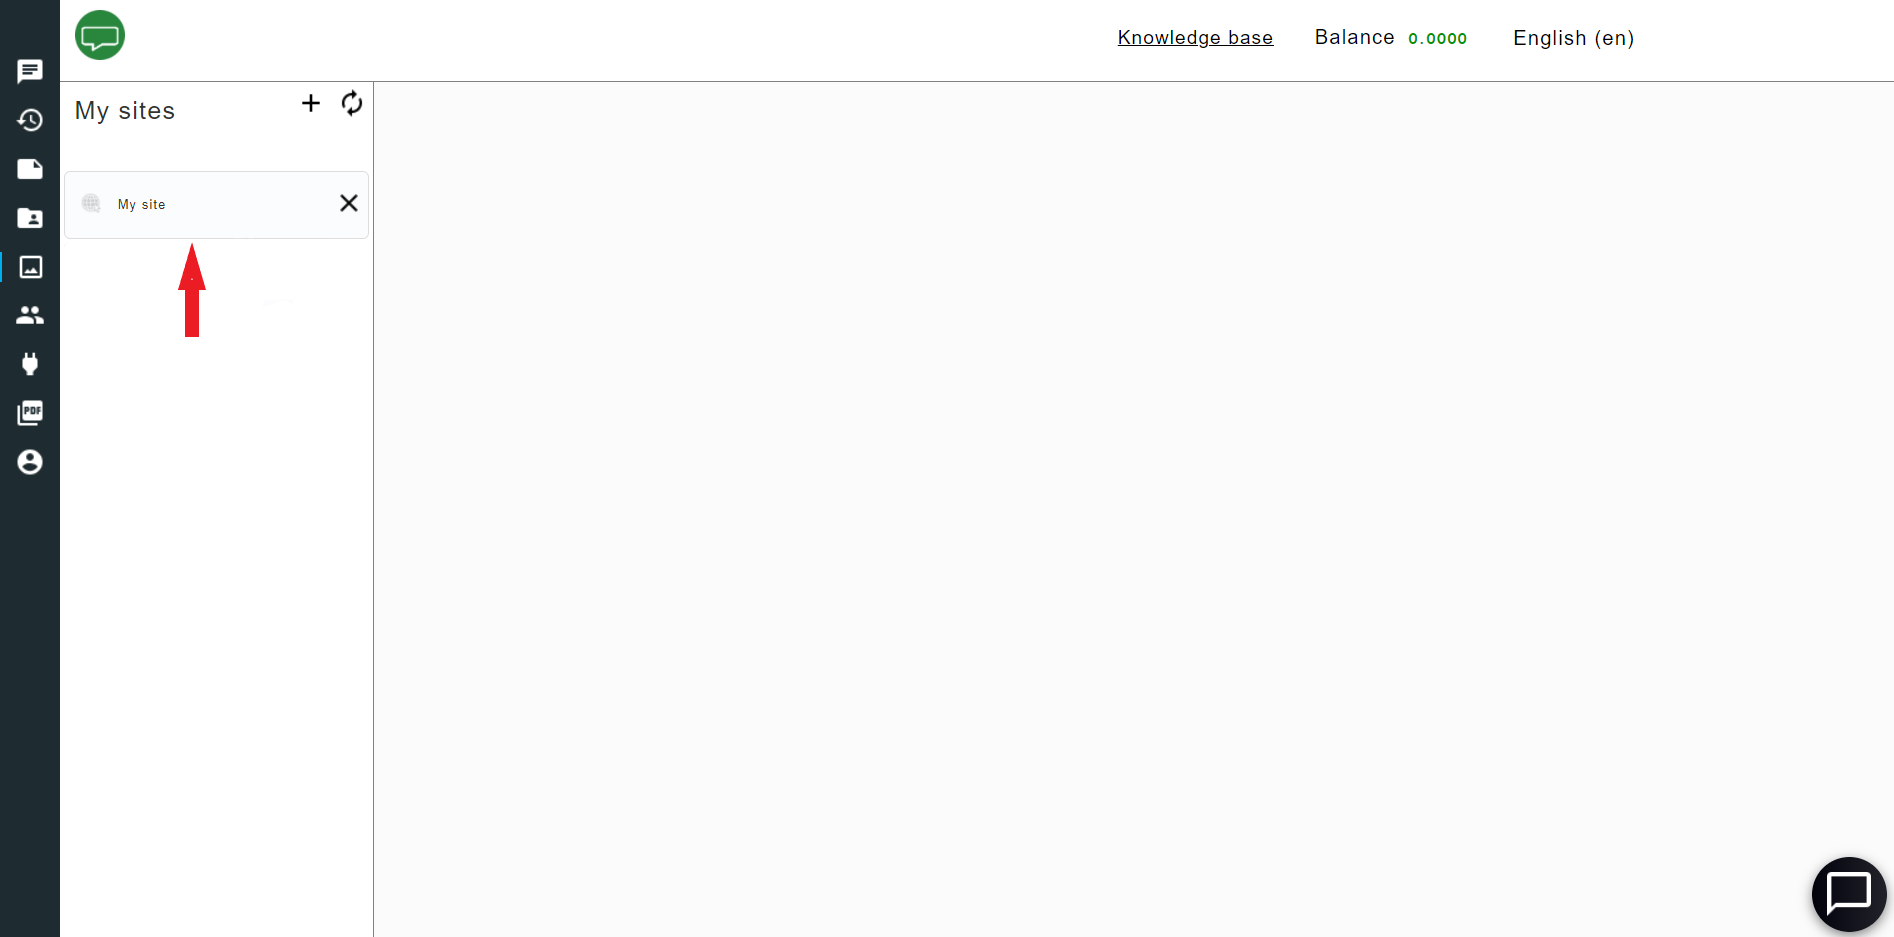
3. Select "My Site".
How to use our plugin.
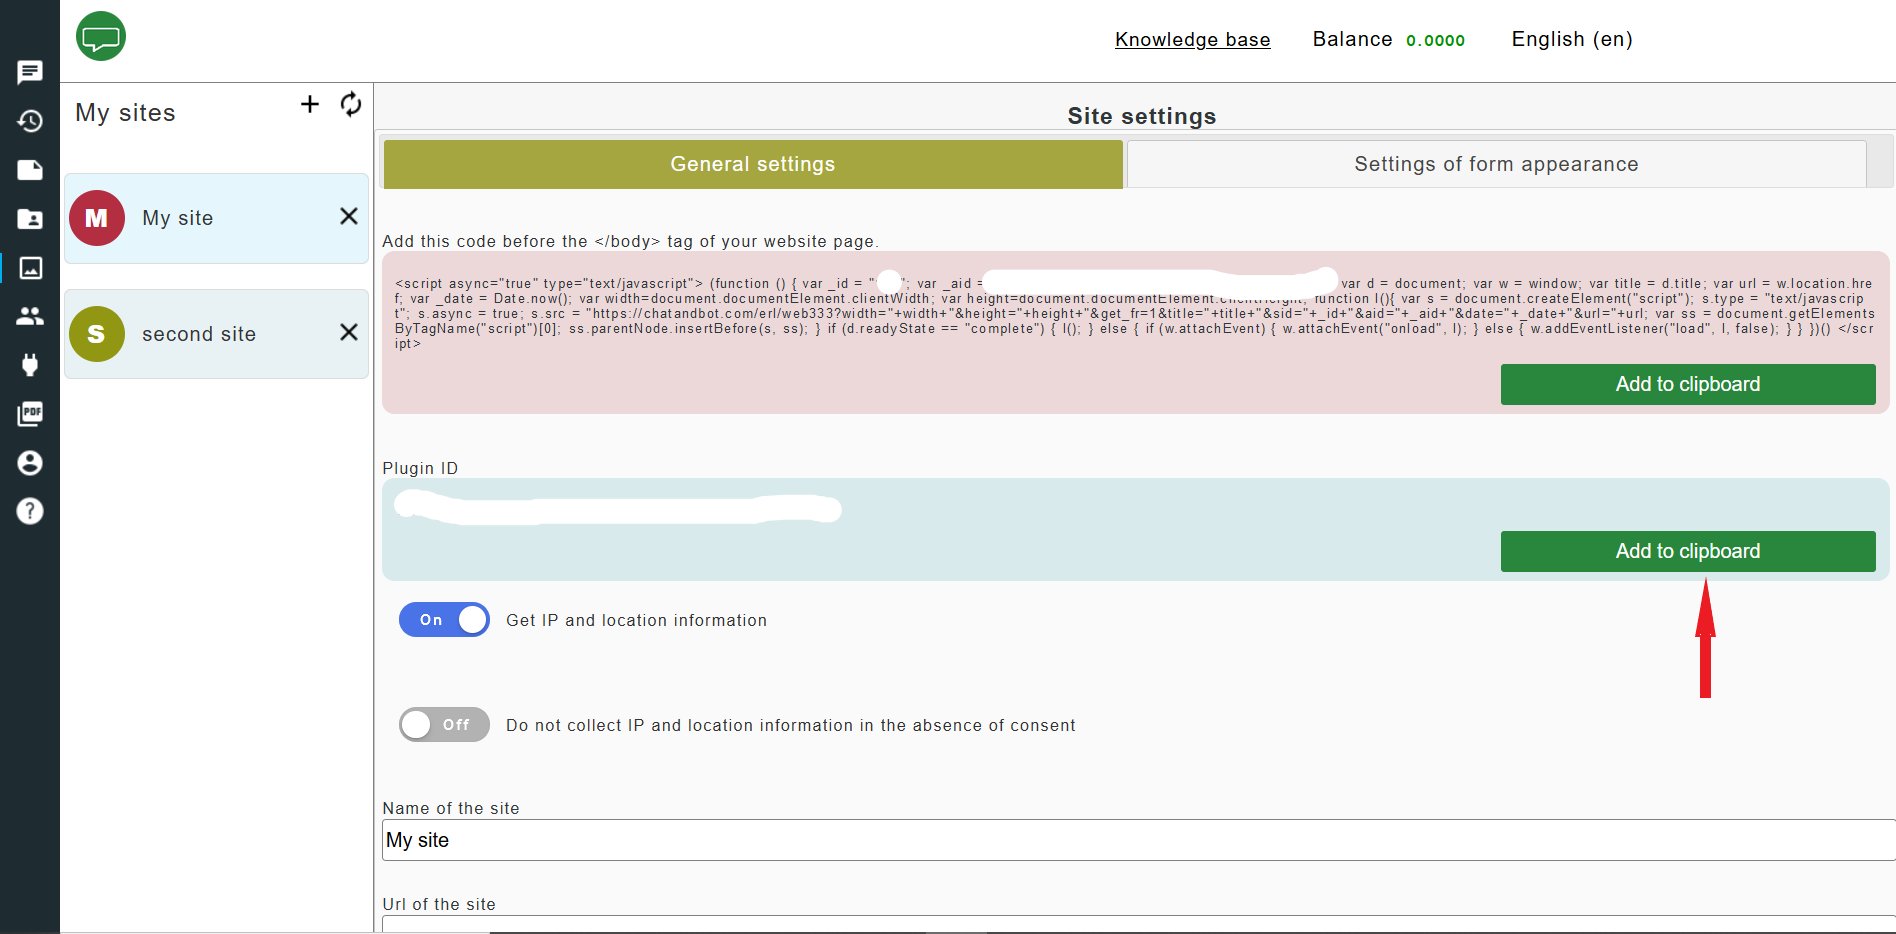
4. Copy the “Plugin ID” using the “Copy to clipboard” button
5. Install the ChatAndBot plugin
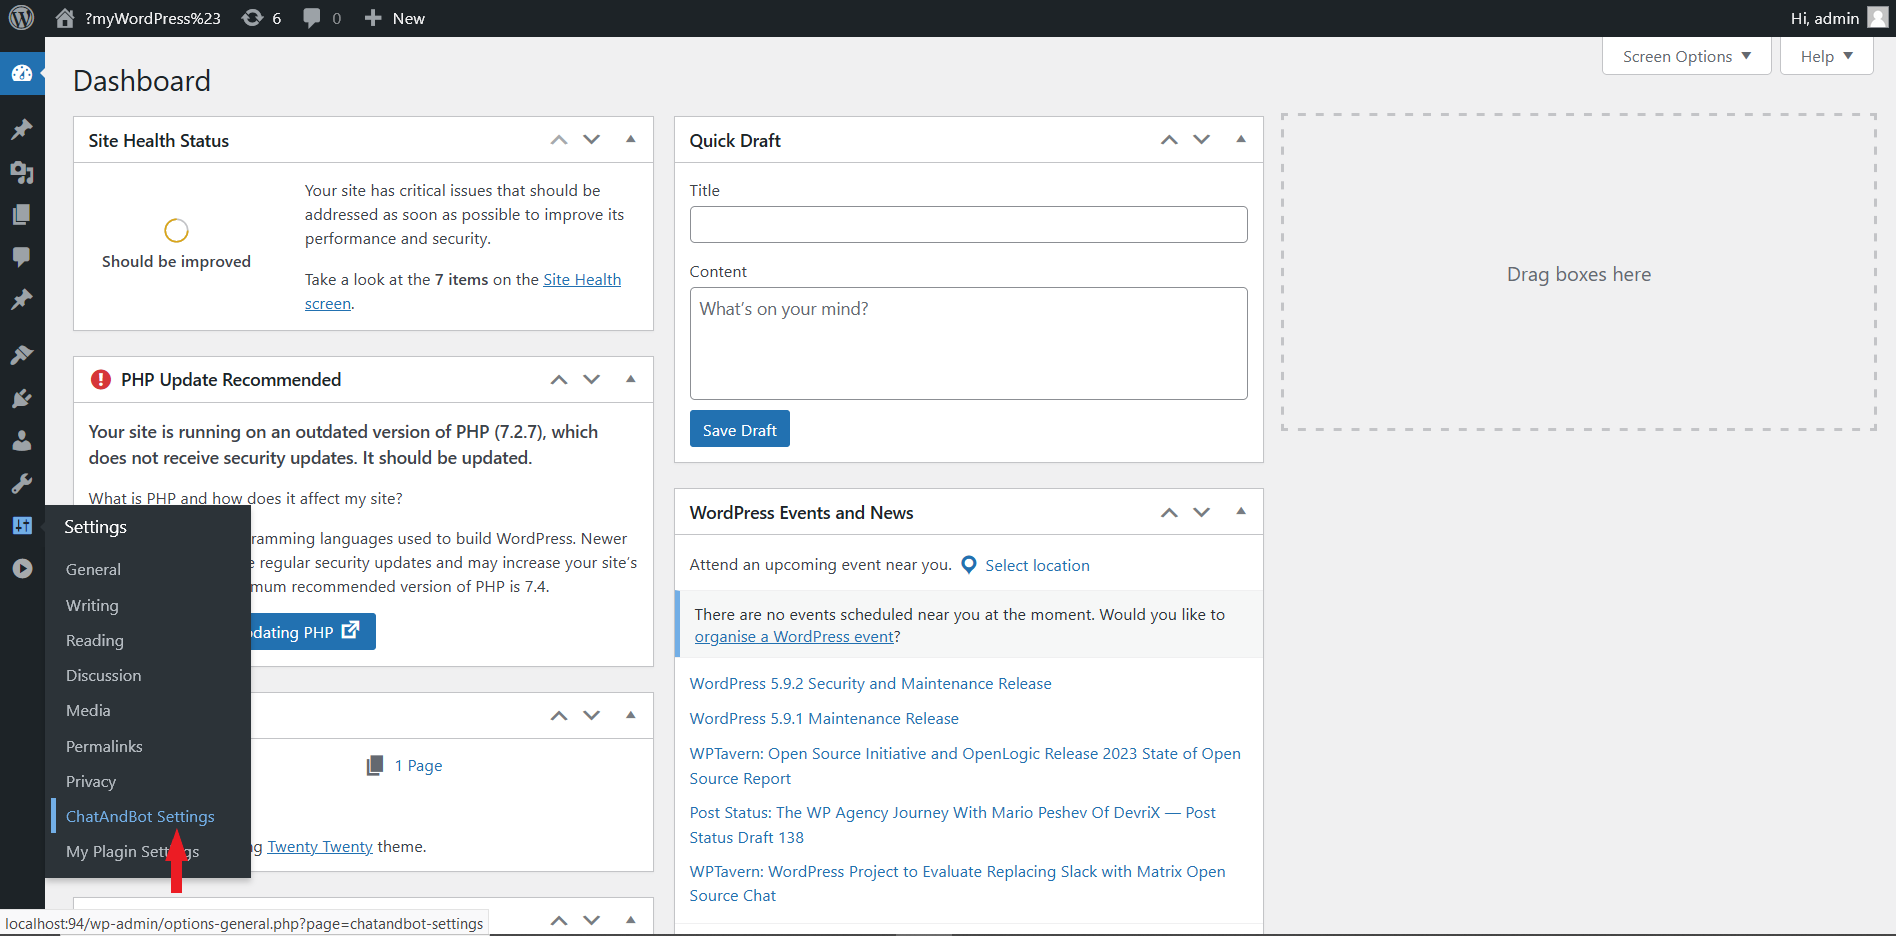
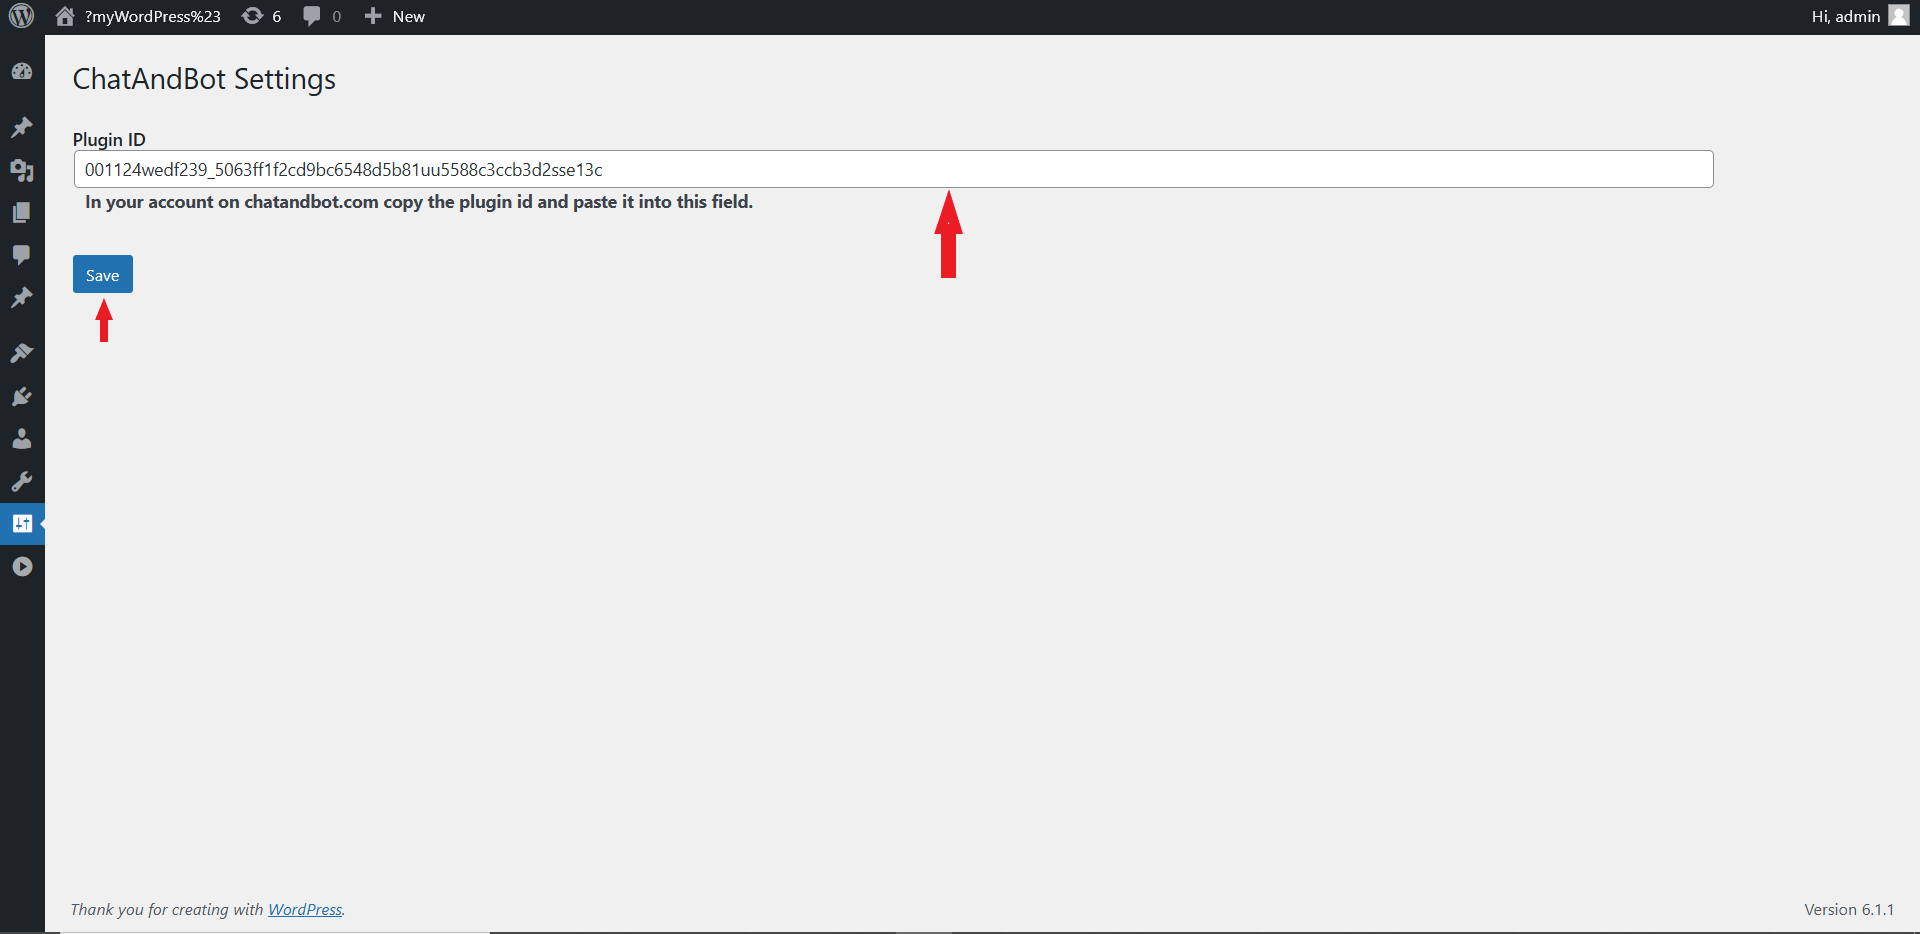
6. Go to ChatAndBot Settings
7. In the “Plugin ID” field, paste the text copied in step 4, then click “Save”.
How to use the "Custom HTML" block.
4. Copy the widget code by clicking the "Copy to clipboard" button.
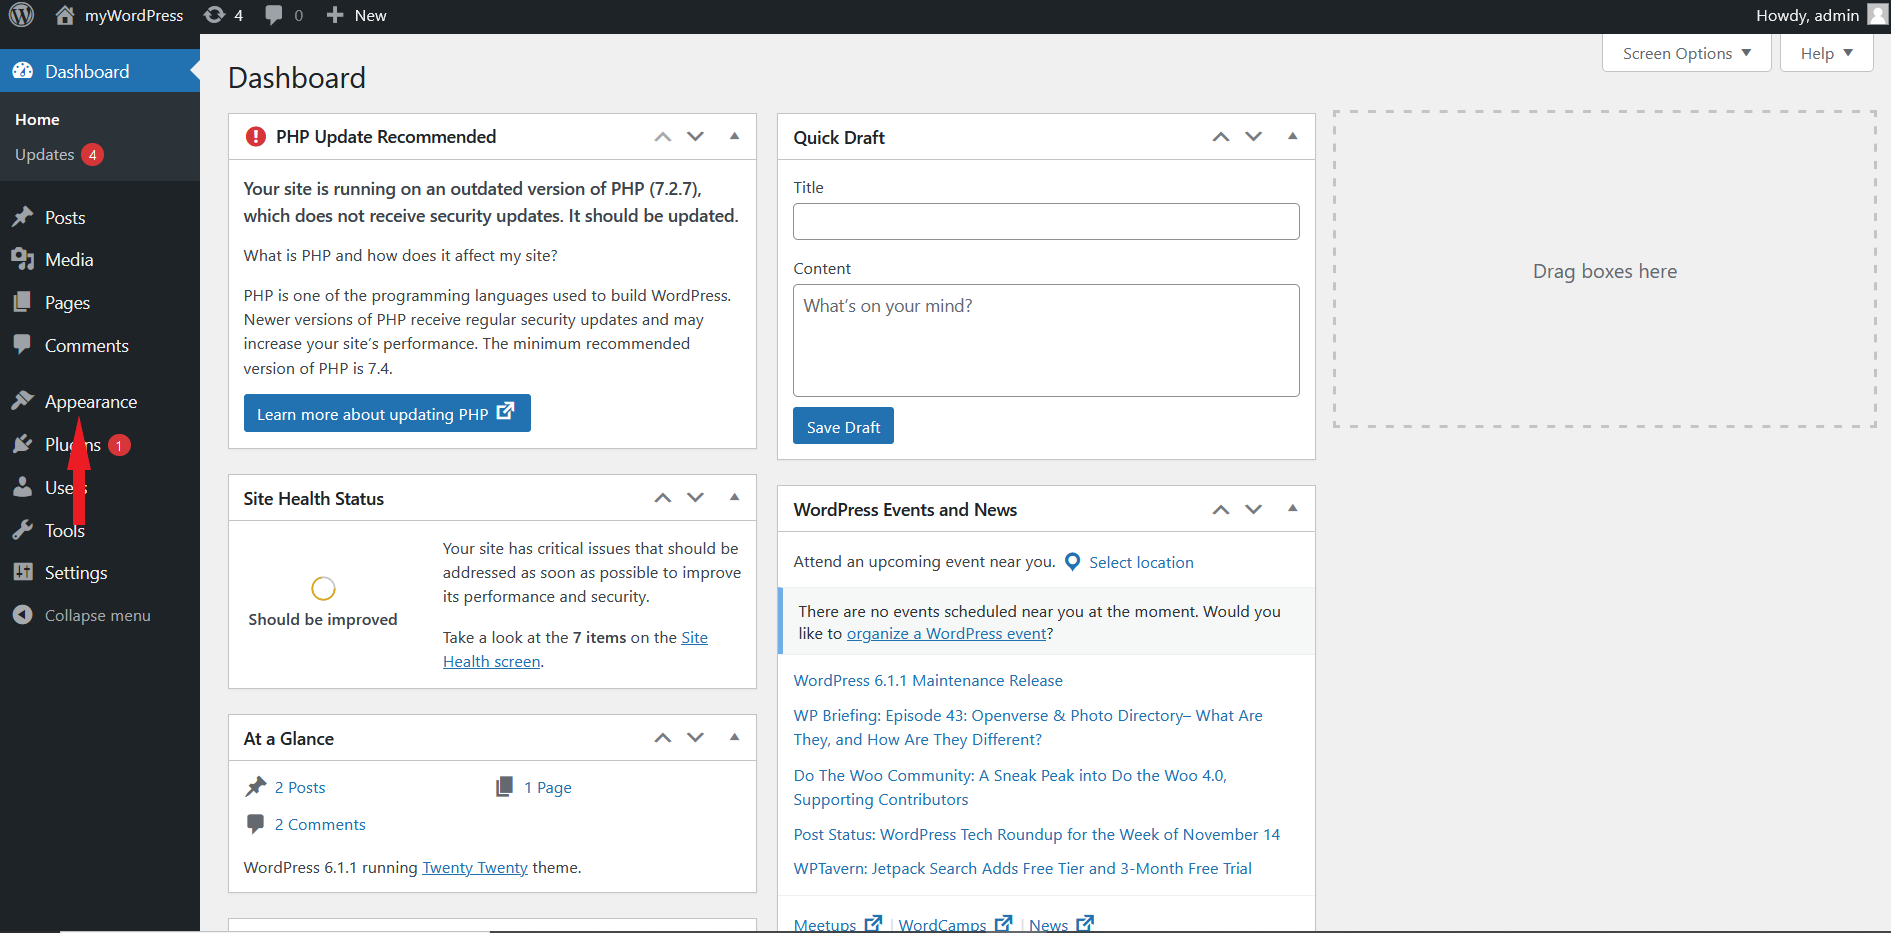
5. Go to wordpress settings.
6. Click "Appearance".
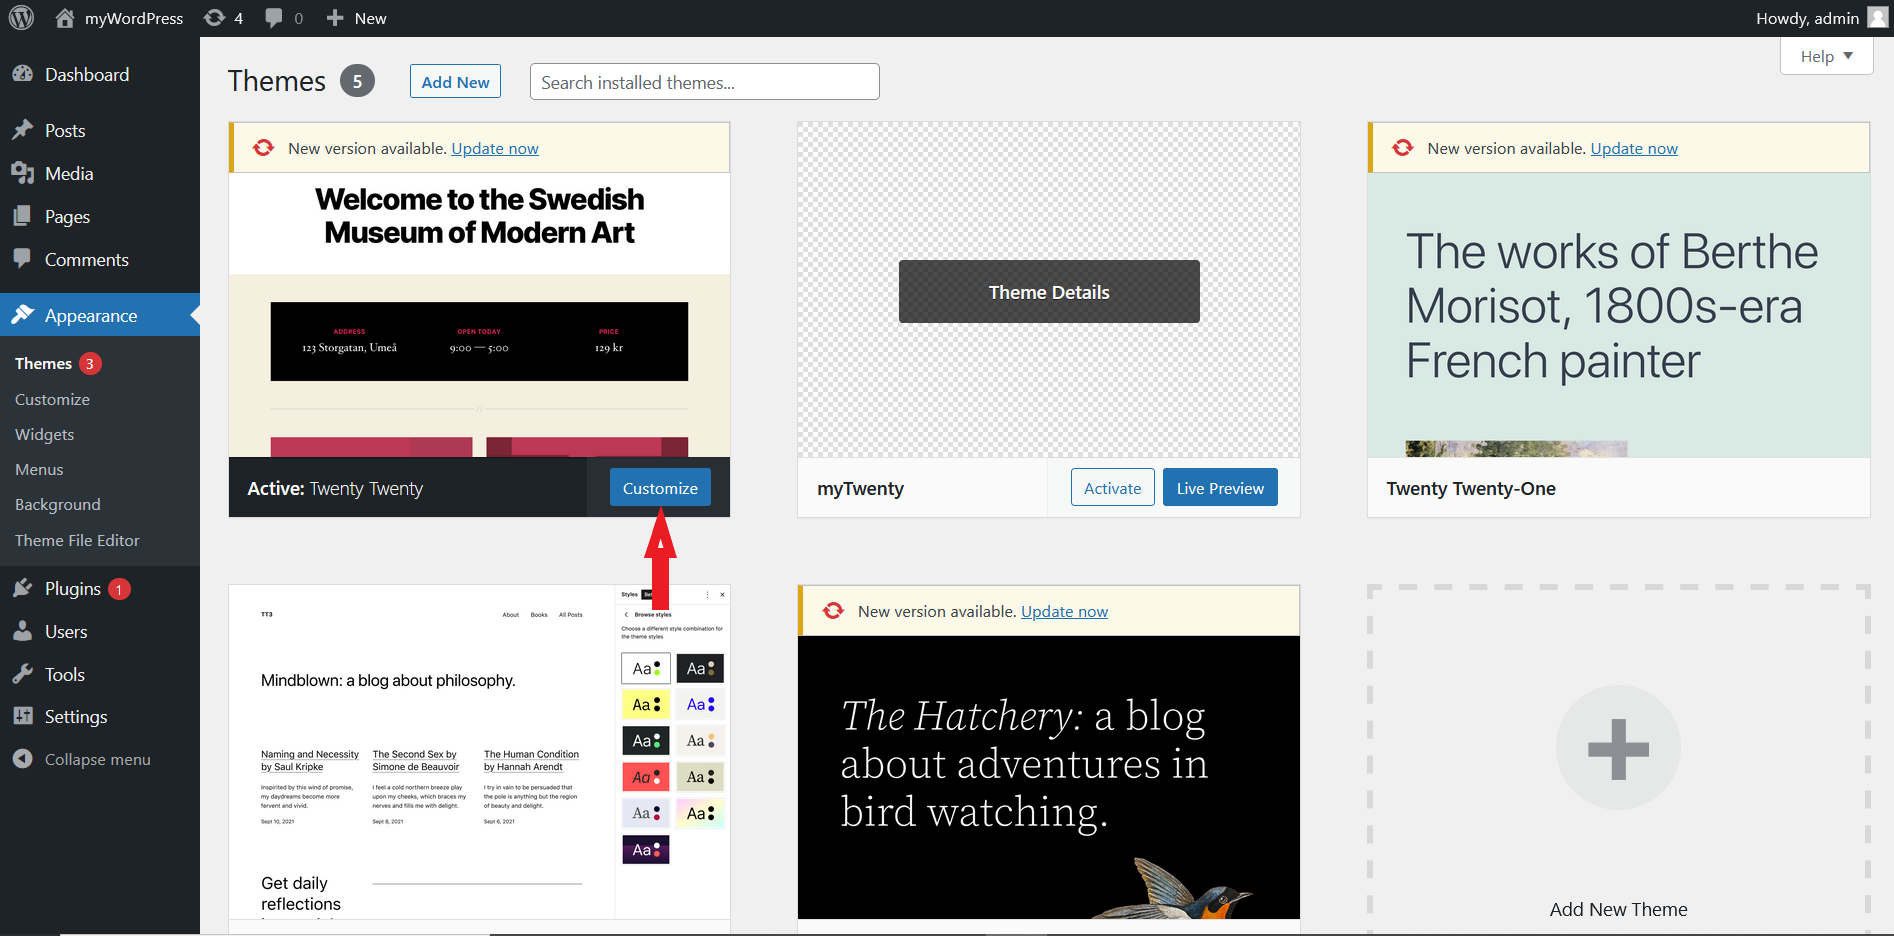
7. Click "Customize" on our theme.
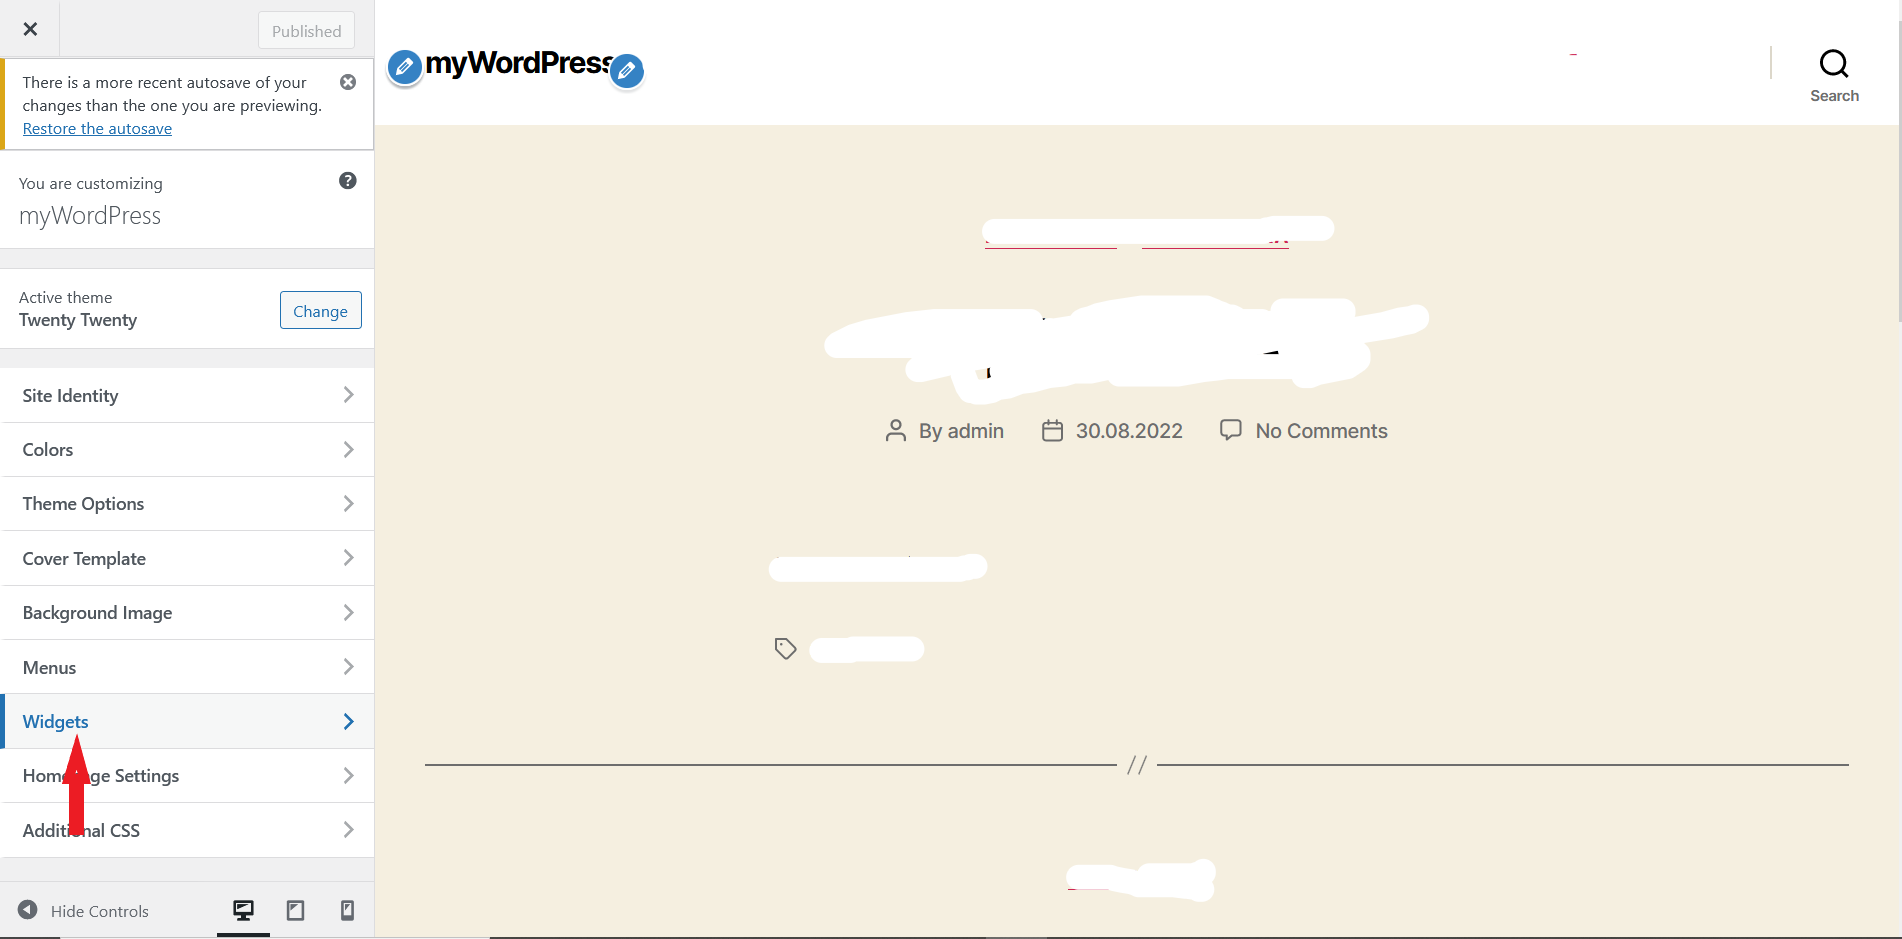
8. Select "Widgets".
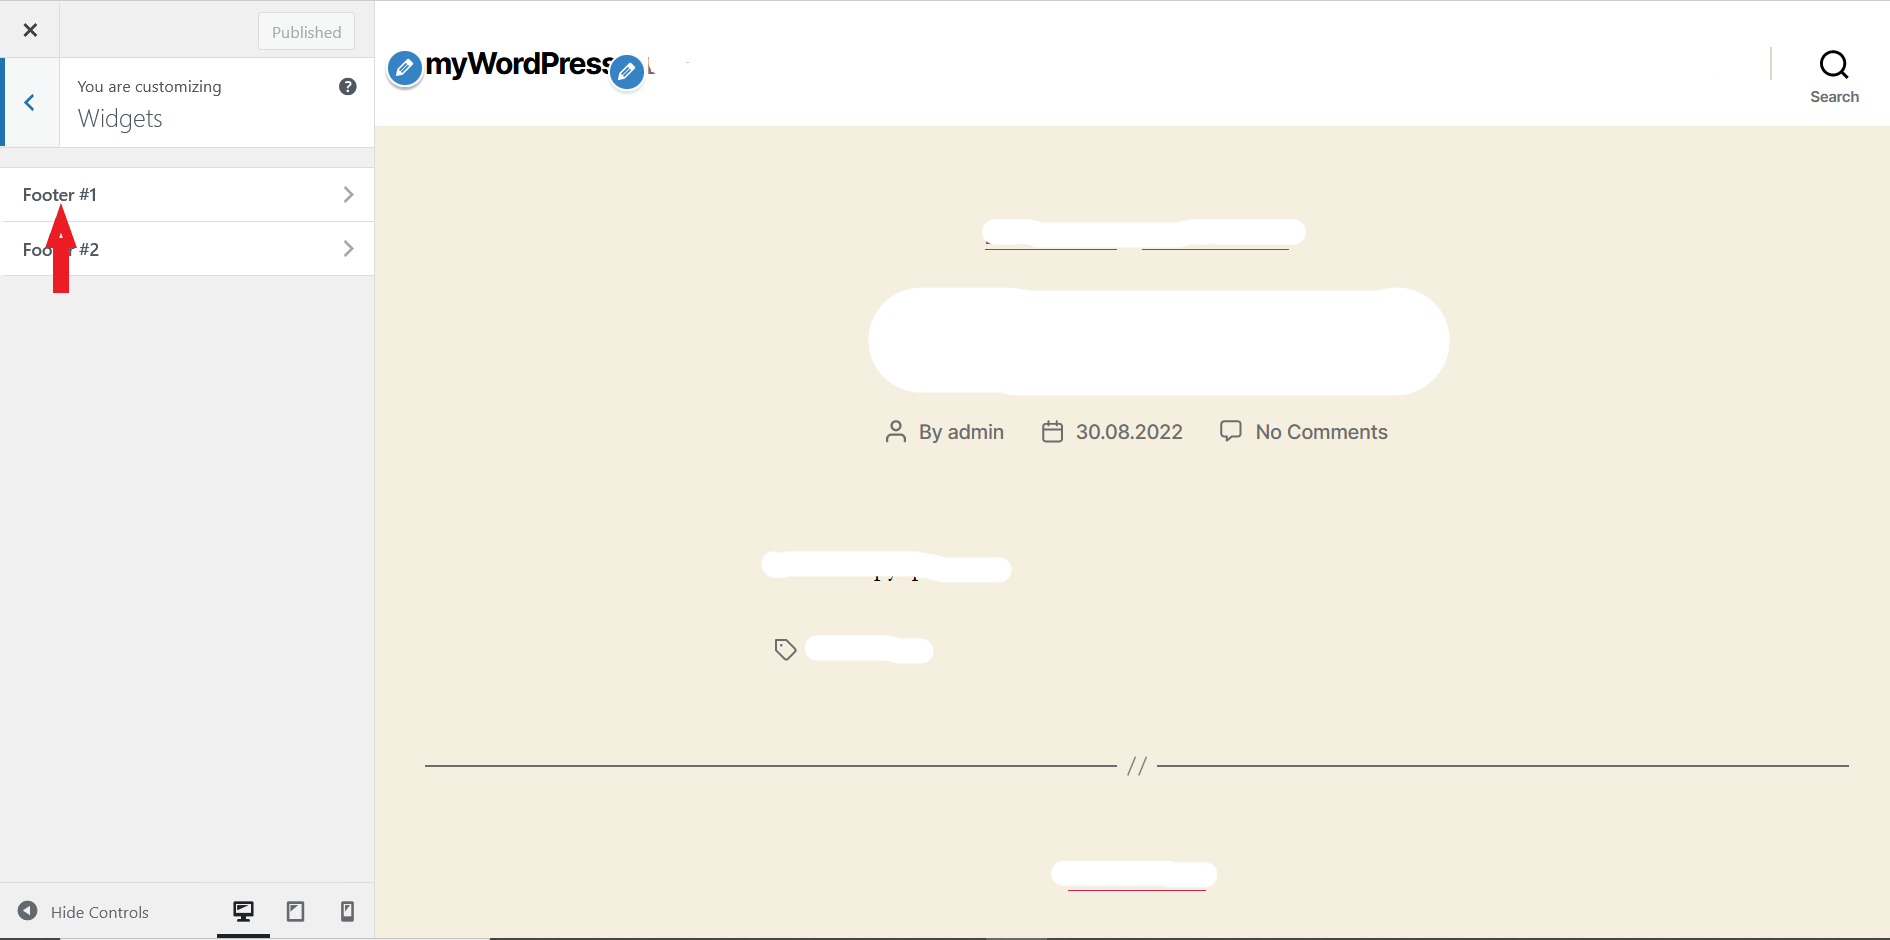
9. Then "Footer #1".
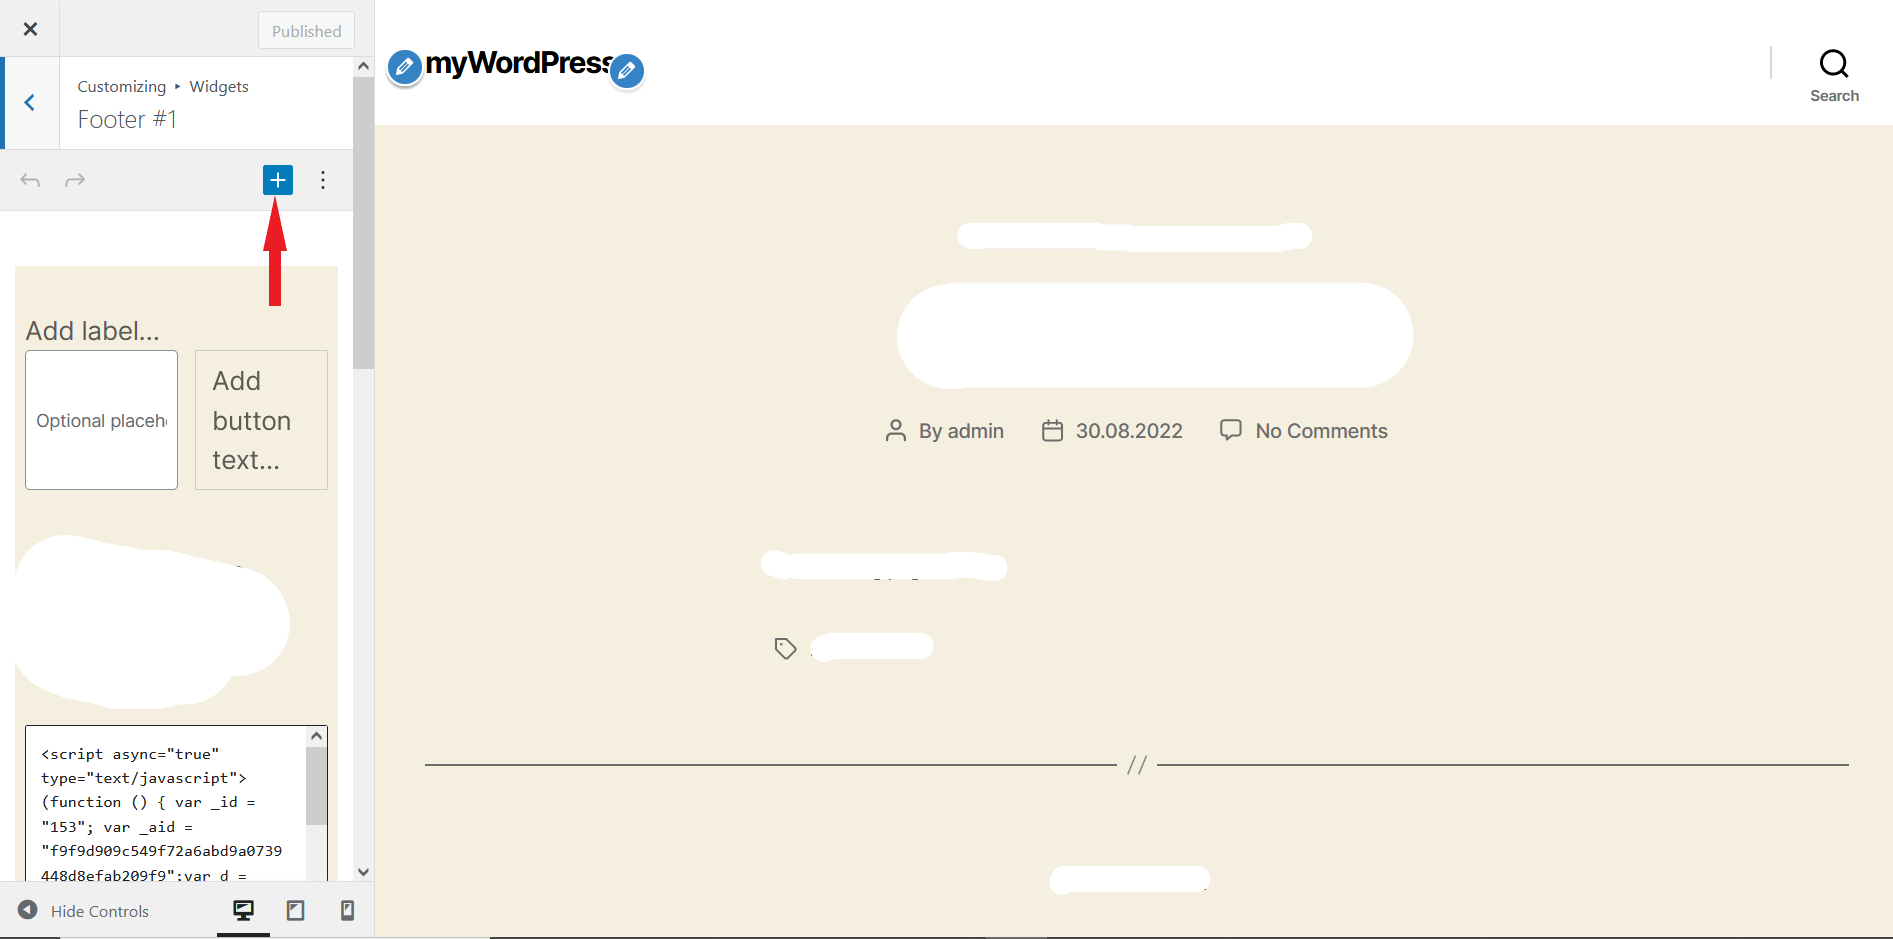
10. Click "Add Block"
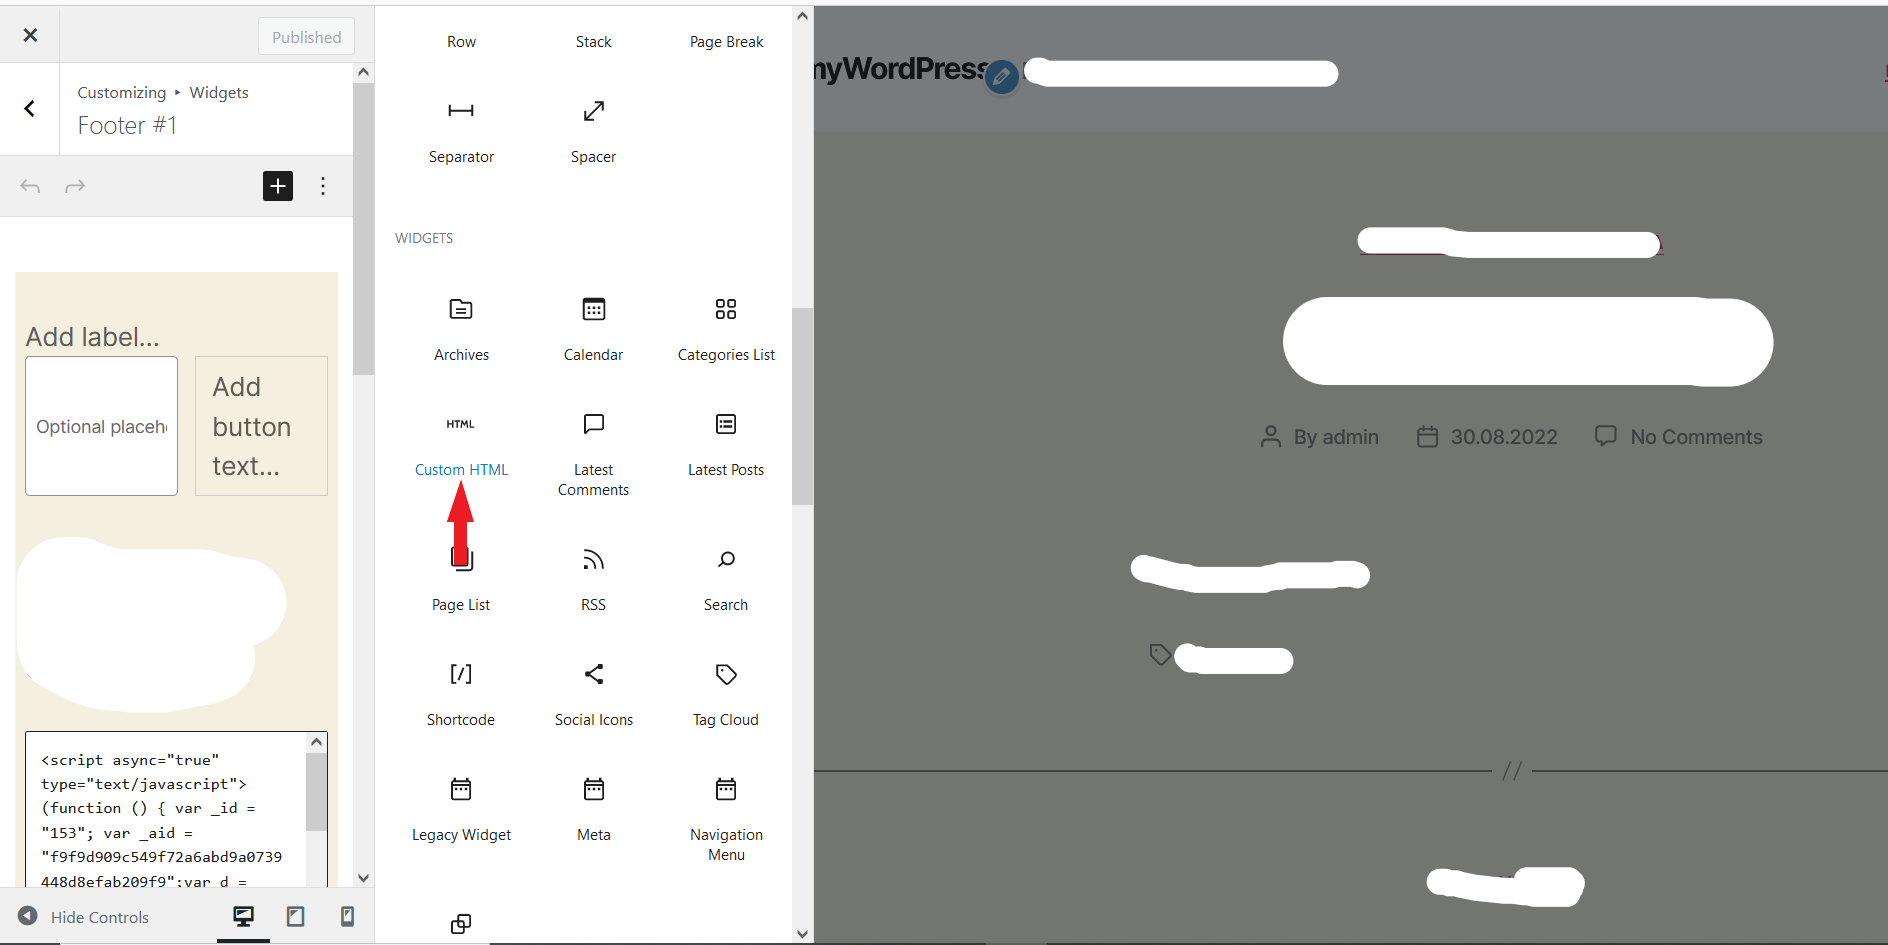
11. In the list that appears, select "Custom HTML".
12. Add this block to the page and paste the text copied in paragraph 4 into it, then click “Publish”.
Now you have the live chat.

